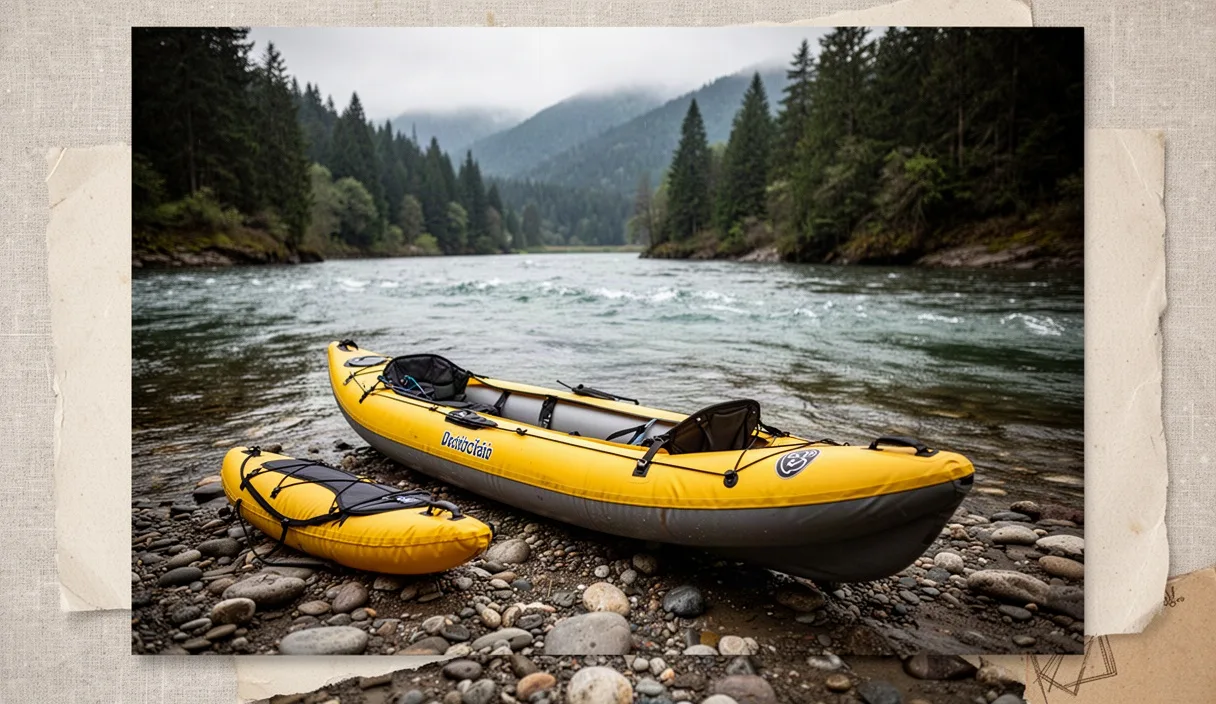
Check river data before inflating. Inflatable kayaks draft differently than hardshell kayaks, sit higher on the water column, and react aggressively to both bottom friction and downstream surface surges. A sudden drop in water volume leaves a loaded PVC or drop-stitch floor scraping across razor-sharp limestone shelves, while an unpredicted surge turns an easy Class I float into an undercut, strainer-choked hazard. Gauge reading is an essential mechanical skill, not an academic exercise.
Every river run requires cross-referencing hydrologic monitoring stations against the specific design limits of your boat. Inflatable kayaks carry wider beams, blunt profiles, and flexible hulls that track poorly in fast boil lines and flex over submerged obstacles. Interpreting telemetry data correctly tells you whether your skeg will shear off on shoals or your tubes will get pinned against bridge pilings before you ever pull the boat out of its duffel bag.
Accessing real-time regional river gauge portals
Identify the exact river basin monitoring agency responsible for your watershed. In the United States, use the USGS National Water Dashboard. In Canada, reference the Water Survey of Canada real-time hydrometric data portal. Across the United Kingdom, consult the Environment Agency river levels API and web portals. In Australia, check the Bureau of Meteorology water data network. Bookmark the specific hydrometric station code for your run rather than relying on generalized third-party weather applications, which often refresh on delayed 6-hour or 12-hour caching cycles.
Station location relative to your put-in and take-out points dictates data accuracy. If a gauge sits 14 kilometers upstream of your launch site, it records conditions that occurred hours prior, without factoring in local creek runoff between the gauge and your boat. Conversely, a gauge downstream of an unregulated tributary will show volume that does not exist on your run. Map the physical coordinates of the sensor station to verify that no major dams, agricultural diversions, or free-flowing tributaries enter the channel between the sensor and your intended route.
Evaluate data transmission latency before driving to the launch. Most public stations use satellite or cellular telemetry that transmits packets on a 15-minute to 60-minute delay. A line on a hydrograph that appears stable may simply hide a flash flood if the last transmission occurred 55 minutes ago during a torrential cloudburst. Check the station status timestamp. If the status flag indicates sensor maintenance, estimated values, or communication errors, verify the river conditions manually with local liveries or park rangers before launching.
Translating cubic meters per second into water depth
Distinguish between volumetric discharge and river stage height. Discharge measures the volume of water moving past a specific cross-section of the river channel per unit of time, stated in cubic meters per second (cumecs or m3/s) or cubic feet per second (cfs). Stage height measures the elevation of the water surface above an arbitrary vertical datum, expressed in meters or feet. A gauge can show a stage of 1.2 meters, but that metric alone does not tell you whether the water is spread across a 90-meter floodplain or compressed through a 6-meter rock slot.
The channel geometry determines how discharge translates to depth. In narrow, steep-walled gorges, a minor increase in discharge, such as a jump from 8 m3/s to 15 m3/s, causes a dramatic surge in water depth and current speed. On wide, alluvial braided rivers, that exact same increase of 7 m3/s spreads out across wide gravel banks, raising the surface by barely 4 centimeters. You must learn the rating curve of your target river, which is the empirical relationship between stage height and volume plotted over years of manual field calibration.
| Discharge (m3/s) | Average River Stage | Inflatable Kayak Performance Dynamics | Mechanical Impact on Boat |
|---|---|---|---|
| Under 2.5 | Below 0.4 m | Sluggish flow, braided channels stall boat, mandatory walking | High floor friction, skeg impact, fabric abrasion on sharp rocks |
| 2.5 to 8.0 | 0.4 m to 0.9 m | Optimal technical floating, clear micro-eddies, low hydraulic force | Standard wear, predictable hull response, occasional bottom tapping |
| 8.1 to 18.0 | 0.9 m to 1.6 m | Pushy current, washed-out rock gardens, fast eddy-line shifts | Hull flex increases, swamping risks rise, requires thigh straps |
| Over 18.0 | Above 1.6 m | Continuous boil, bank-to-bank flow, eliminated recovery zones | Tubes compress against strainers, heavy broaching forces |
Monitor the hydrograph trend line over the preceding 48 hours. A river flowing at 10 m3/s on a descending limb (water level falling after a peak) offers stable, settling water with predictable debris patterns and receding foam lines. That same 10 m3/s on a steeply rising limb means the channel is filling rapidly with turbulent backcurrents, mobile gravel, floating brush, and shifting hydraulic features that change lap by lap.
Scouting seasonal low-water gravel bars and scrape zones
Calculate your working operational draft under full load. A standard solo inflatable kayak carrying an 82-kilogram paddler and 15 kilograms of gear draws between 8 and 14 centimeters of water at the center of the floor. Tandem boats or drop-stitch floor models loaded with multiple paddlers can draw up to 22 centimeters. If the gauge indicates seasonal base flows, long stretches of the river will drop below this operating threshold, exposing vast gravel shoals that require continuous portaging or hull dragging.
Low-water runs present distinct structural hazards to inflatable materials. While flexible hulls absorb blunt impacts better than rigid plastic, sharp river shale, broken bedrock, and rusted scrap metal embedded in gravel bars will slice through PVC, Nitrylon, and Hypalon when the full weight of a paddler drives the material downward. In shallow scrape zones, remove the tracking fin or skeg entirely. A rigid skeg caught between two river stones acts as a pry bar, ripping the skeg box seam clean off the floor fabric.
- Read the V-markers: Look downstream for pointing V-shapes of darker, glassy water that mark the deepest river channels through shoals; avoid upstream-pointing Vs, which indicate submerged rocks.
- Distribute your weight: Shift your torso forward when scraping over unavoidable bars to unweight the deeper-drafting stern and prevent the floor fabric from pinching between your seat and the gravel bed.
- Anticipate braided traps: At low flows, islands divide rivers into multiple narrow chutes; select the channel carrying the main volume early, as backing an inflatable out of a dead-end dry braid against even a 4 km/h current is exhausting.
High-flow warning signs: turbidity, foam, and river debris
Turbidity shifts signal immediate changes in upstream watershed stability. When a river transitions from clear or slate-green to opaque chocolate-brown or deep red, the water is carrying an extreme suspended sediment load. This grit acts as liquid sandpaper against wet rubber and coated fabrics. More critically, high turbidity completely blinds you to shallow submerged boulders, sharp iron rebar, and log snags resting just 5 centimeters below the churned surface.
Foam lines indicate powerful subsurface hydraulic mechanics. Thick, dirty froth collecting along the banks or recirculating in oversized eddies reveals heavy organic agitation, typical of reservoir releases or sudden hillside runoff. When foam lines stretch down the center of the river channel, strong lateral shear lines exist between main current threads and slow-moving water. An inflatable kayak striking these shear lines sideways can catch an outside tube edge, dumping the paddler into aerated, low-buoyancy water.
Watch for floating debris that outpaces or matches your drift speed. Leaf mats, clusters of branch twigs, and dislodged root balls mean the river has breached its normal margins and is actively clearing its upper banks. If you observe whole logs floating downstream, abort the launch immediately. Inflatables lack the instant bow-rudder acceleration of hard composite kayaks, making it difficult to dodge half-submerged wood traveling through fast bends where strainers collect on outside curves.
Establishing hard launch and abort parameters
Define binary go and no-go metrics before leaving your house. Relying on subjective feelings at the riverbank leads to poor risk assessment, especially after you have spent time driving, packing dry bags, and pumping chambers to 8 or 10 PSI. Establish hard numbers based on local gauge readings, seasonal water temperatures, and paddler experience.
- Check the upper discharge threshold: Establish the maximum flow rate at which the run remains within your rescue capability. For a novice in an inflatable kayak on an unfamiliar Class II river, a flow rate exceeding 25% of the seasonal median should trigger a mandatory venue change or cancellation.
- Check the lower stage floor: Set a baseline stage level below which the river requires excessive dragging. If the gauge shows depth beneath the minimum operational draft for more than 30% of the recorded river miles, abandon the trip to avoid hull degradation and channel bed destruction.
- Calculate rate-of-rise limits: If the hydrograph reveals that the river stage has risen more than 15 centimeters within a three-hour window prior to departure, declare an automatic abort. Fast-rising rivers pack unpredictable debris and transform benign eddies into boiling, unusable pockets.
- Evaluate combined air and water temperatures: Apply the 45-degree rule. If the combined water temperature and air temperature in degrees Celsius totals less than 45, thermal protection suits are mandatory. If that total falls below 25, high-flow runs should be avoided due to the rapid onset of cold-shock incapacitation if dumped.
Common mistakes
Many paddlers make the mistake of reading the nearest gauge instead of the most relevant gauge. A sensor mounted on a concrete bridge abutment in a flat urban section 20 kilometers downstream reveals little about the steep, boulder-strewn canyon reach where you intend to put in. Always verify the elevation drop, regional tributary inputs, and terrain differences between the station and your specific river section.
Another dangerous error is confusing the physical stage height between different rivers. A stage of 2.1 meters on a wide, open river might mean gentle flatwater, whereas that same 2.1 meters on a narrow limestone gorge next door represents catastrophic flood stage. Stage is a relative measurement from an arbitrary zero point established by surveying engineers, not a standardized measure of water depth across river systems. Compare stage only against historical markers for that precise gauge.
Paddlers also frequently forget to inspect dam release schedules on regulated rivers. Hydroelectric facilities rarely operate on natural rainwater hydrographs. A gauge can look safe at 07:00, but a scheduled peaking release at 09:00 can send a wall of water downstream that triples the river volume in under 40 minutes. If the waterway features an upstream dam, consult the operating utility power generation calendar alongside regional hydrologic monitoring portals.
Practical next steps
Start by identifying your home river's primary monitoring station. Find the unique eight-digit or ten-digit gauge ID code from the national hydrometric service and save the direct station URL to your smartphone home screen. Review the historical data tab to study the maximum, minimum, and median discharge numbers recorded over the past ten years for each month of the paddling season.
Next, correlate your physical experiences on the water with real-time numbers. After completing any paddle trip, immediately take a screenshot of the station hydrograph and log the date, discharge rate, stage height, and your subjective observations. Note how the boat handled specific rapids, where your skeg scraped, and how accessible the eddy lines were at that exact volume. Over a single season, this personal logbook will transform raw numeric telemetry into an accurate, reliable predictive tool for safe inflatable kayaking.