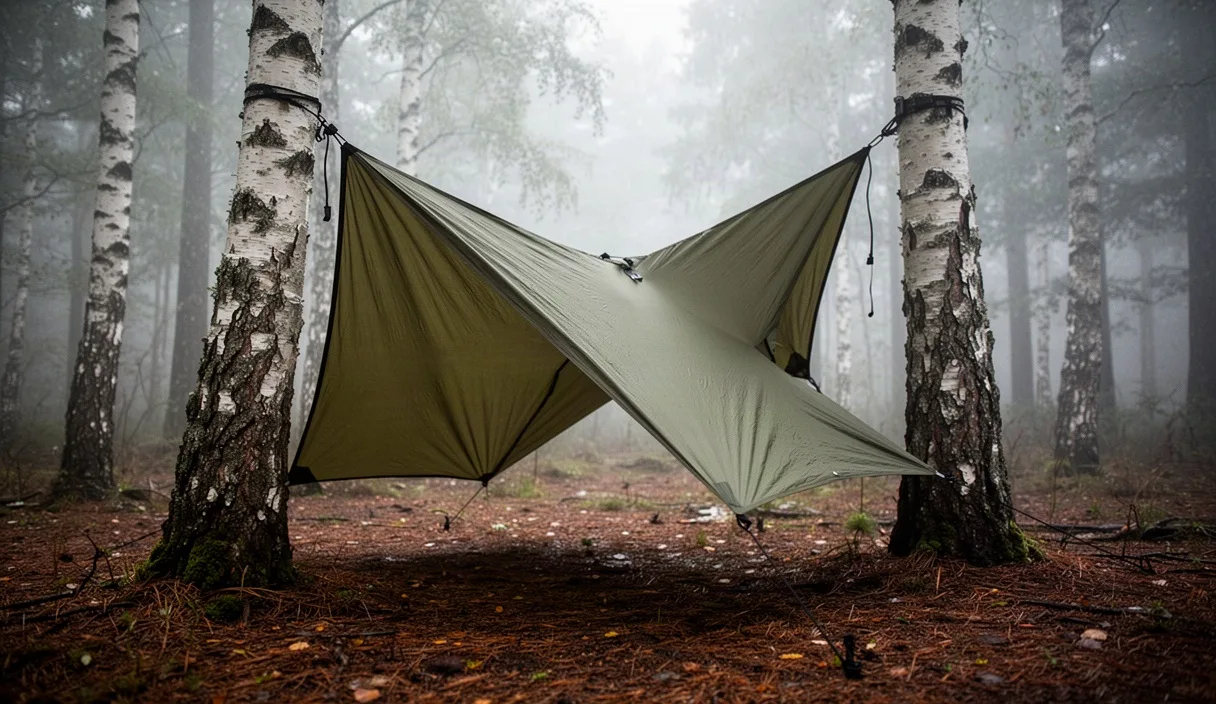
Dense woodland provides immediate wind protection, but pitching a dependable tarp requires deliberate mechanical steps. A 10-foot by 10-foot flat tarp or an 11-foot ultralight hex tarp delivers adaptable shelter across spring, summer, and autumn if you anchor it properly. Unlike free-standing tents, a tarp depends entirely on the surrounding environment for structure. Forest floors, canopy density, and tree species dictate every line you tie and stake you drive.
Three-season backcountry travel brings fluctuating conditions: driving rain, wind shifts, and morning humidity trapped beneath the tree canopy. Success relies on reading the terrain, understanding tension mechanics, and utilizing available deadfall. Setting up a stable shelter takes 10 to 15 minutes once you master the foundational knots and anchor assessments.
Selecting anchor trees and checking overhead hazard limbs
Anchor selection determines whether your shelter survives a storm. Begin by finding two live, mature trees spaced between 13 and 18 feet apart. This distance accommodates an 11-foot ridgeline while leaving enough working room for tensioning hitches and drip lines. Select trees with a trunk diameter of at least 7 inches at chest height. Birch, oak, maple, and mature pine offer sturdy root structures. Avoid shallow-rooted species like young spruce or willow growing in marshy soil, as they can flex or uproot under the lateral load of a wind-strained tarp.
Scan overhead before setting your pack down. Forestry crews call dead overhead branches "widowmakers" because they detach without warning during wind gusts. Look up through the canopy at a 360-degree angle. Check for snapped boughs hung up in the fork of adjacent trees, peeling bark along upper limbs, and fungal conks growing on the main trunk. Fungi indicate interior heart-rot, meaning the tree could snap under wind shear. If a tree shows dead crown branches or lacks foliage compared to its neighbors, walk away and choose another anchor pairing.
Check the ground plane next. Avoid low depressions, dry creek beds, and terrain showing visible water channels. Heavy rainfall saturates natural swales within an hour, running straight through your sleeping area. Target a flat, slightly crowned patch of ground between your anchor trees. Clear away loose pinecones, sharp rock fragments, and rotting damp bark that could puncture your groundsheet or harbor wood ticks.
Tying the tensioned continuous ridgeline
A continuous ridgeline sits beneath or above the tarp, supporting its entire length and distributing wind load across both anchor points. Using a 30-foot to 35-foot length of 2.5 mm or 3 mm low-stretch line, such as UHMWPE or braided polyester, prevents tarp sagging during prolonged overnight downpours. Nylon paracord stretches significantly when saturated and should be avoided for primary ridgelines.
Attach the line to the first tree using a quick-release anchor:
- Pass the working end of the cord around the trunk at approximately eye level, roughly 5 to 5.5 feet off the ground.
- Form a running loop around the standing line and secure it with a toggle stick using a Marlin spike hitch, or lock it down with a timber hitch.
- Walk the line across to the second tree, keeping it clear of underbrush to prevent snags.
Tension the opposite end using a trucker's hitch. Wrap the line around the second tree at the same height. Create a directional slip knot in the standing part of the line roughly 2 feet back from the trunk to act as a pulley. Pass the working end around the trunk, route it back through the slip knot loop, and pull hard toward the tree. This mechanical advantage creates guitar-string tension across the span. Secure the line with two half-hitches slipped behind the pulley loop for a quick morning breakdown.
Connect the tarp to the ridgeline using Prusik loops or Klemheist hitches tied from 1.75 mm or 2 mm utility cord. Two loops are required, one for each end of the tarp ridgeline tie-outs. Pass a smooth wooden toggle through the tarp tie-out loop and the Prusik loop. Slide the friction hitches outward toward each tree. The friction grip maintains tension along the tarp fabric while allowing you to center the shelter over your chosen sleeping surface.
A-frame versus lean-to configurations in crosswinds
Wind direction dictates tarp pitch geometry. Woodland canopies baffle direct gale-force winds, but forest corridors, logging roads, and ridge saddles funnel drafts in unpredictable directions. You must match the tarp profile to the prevailing nighttime weather forecast.
The A-frame provides reliable protection against shifting crosswinds and cold precipitation. In this setup, the ridgeline centers under the tarp, and both sides angle downward toward the ground at approximately 40 to 45 degrees. Staking both sides low creates a windbreak that shields your sleep system from spray. The interior space remains compact, concentrating body heat and keeping rain from blowing under the edges. The primary trade-off is reduced interior headroom and limited visibility outside the shelter.
The lean-to maximizes living space and allows ambient heat collection from a campfire positioned upwind at a safe clearance. The ridgeline is hitched high, around 5 to 6 feet, while the back edge stakes directly to the forest floor at an angle facing into the prevailing wind. This configuration provides a covered porch for gear maintenance and cooking. However, if the wind shifts 180 degrees during the night, the lean-to acts as a sail, catching the breeze, ripping out stakes, and channeling rain straight into your bivy.
| Feature | A-Frame Pitch | Lean-To Pitch |
|---|---|---|
| Wind Stability | High; deflects gusts from two opposing quadrants | Moderate; vulnerable to sudden frontal shifts |
| Usable Covered Area | Medium; requires central sleeping orientation | High; broad front clearance for gear and movement |
| Rain Runoff Speed | Fast along dual sloped faces | Fast along a single steep planar surface |
| Ground Anchor Count | Requires 4 to 6 perimeter ground stakes | Requires 3 to 4 rear ground stakes |
| Campfire Heat Retention | Low; steep sides deflect rising warm air | High; angled roof catches radiant heat |
When unexpected high crosswinds hit an A-frame pitch, lower the ridgeline by 12 to 18 inches down the trunk. Move your stake lines outward to decrease the wind profile, or pin the tarp edges directly against the ground using rocks or logs along the perimeter hem.
Carving field stakes from hardwood branch cuttings
Carrying metal stakes adds pack weight that dense woodlands make unnecessary. Carving field stakes from fresh deadfall or self-pruned branches takes two minutes per stake and produces solid holding power in thick forest duff. Never cut live trees for stakes. Look for recently fallen limbs from dense hardwoods such as ash, beech, oak, or hornbeam.
Select branches that match the thickness of your thumb, approximately 0.75 to 1 inch in diameter. Snap or saw the wood into sections between 9 and 12 inches long. Softwoods like pine or rotted wood snap under the force of a mallet stone, so test the branch over your knee before carving. Soft, spongy, or lightweight branches must be discarded.
Carve the ground point using clean, controlled push cuts with a fixed-blade knife:
- Place the wood against a flat log for support; do not cut toward your legs or free hand.
- Bevel four flat facets at a 45-degree angle to create a wedge point rather than a needle tip. A sharp needle point curls or splits when driven into subterranean roots or hidden stones.
- Chamfer the top strike face by carving a small 45-degree bevel around the top edge of the stake. This prevents the head from mushrooming or splitting apart under mallet blows.
Cut a secure guyline notch 1.5 inches below the top strike face. Make a perpendicular stop cut into the branch roughly one-third of the way through the wood. Make a second, angled cut starting an inch lower down the shaft, cutting upward toward the base of the stop cut. Pop out the wood chip to create a clean, 90-degree shelf. The guyline cord drops into this notch, preventing it from slipping over the head of the stake when the wind jerks the tarp fabric.
Drive field stakes into the ground at a 45-degree angle pointing away from the shelter. This orientation counteracts line pull through simple soil resistance. In soft leaf mulch, place a heavy rock or dead log across the top of the driven stake to prevent it from pulling loose.
Managing interior condensation in damp lowlands
Low-lying woodland floors accumulate moisture through plant transpiration and natural drainage. Saturated river bottoms, moist hollows, and damp fern groves produce dense air that condenses against cold tarp fabrics. Silnylon and polycro will display heavy water droplets on the underside by 04:00 as temperatures drop toward the dew point. Touching the fabric then drenches your sleeping bag.
Site positioning serves as your first defense against condensation. Set camp on benches, small knolls, or terrain rises at least 30 to 40 vertical feet above visible streams or bottomland swamps. Cold, damp air settles in low terrain features overnight. Elevating your pitch keeps your shelter inside moving air currents that dissipate rising water vapor.
Maintain airflow under the tarp profile. Never seal an A-frame pitch directly to the ground unless severe freezing rain or howling winds demand emergency shelter. Leave a gap of 4 to 8 inches between the tarp hem and the ground on both sides. This creates a natural chimney effect: cool air draws through the bottom gap, picks up moisture from your breath, and vents out the open ridgeline ends.
Manage your groundsheet footprint to control condensation under the canopy:
- Trim or fold the groundsheet so its edges sit 2 to 3 inches inside the perimeter of the tarp roof drip line.
- If the groundsheet extends outside the tarp, dripping rainwater catches on the exposed plastic and pools beneath your sleeping pad.
- Use a breathable water-repellent bivy or a simple nylon top sheet over down insulation to protect against incidental droplets shaken loose by wind or morning bird activity.
Common mistakes
Watch for several frequent errors that compromise tarp pitch stability and comfort:
- Forgetting drip lines on the main cord: Rain running down the ridgeline bypasses tie-outs and soaks the underside of the tarp. Tie a 6-inch strand of cotton or nylon cord to the ridgeline just inside the tree canopy on both sides to direct runoff onto the ground.
- Tying directly to dead standing timber: Dead birch and poplar trees often rot from the core out while remaining vertical. Pulling a tensioned line on these snags can bring the entire trunk down across your sleeping area.
- Over-tensioning guyouts on non-stretch tarps: Modern Dyneema or polyester tarps do not give like nylon. Over-tightening corner stakes can rip reinforced tie-out stitching or tear the hem. Apply firm tension, not maximum force.
- Improper guyline departure angles: Guylines run off the tarp corners should bisect the corner seam angle directly. Guying lines out at odd side angles distorts the pitch, slackens the center fabric, and creates water collection pockets.
Next steps for the woods
Master these skills before your next multiday trip into remote forest. Head to a local park or your backyard with your shelter kit, two 35-foot hanks of cordage, and a fixed-blade knife. Practice tying the trucker's hitch and Prusik loops under three minutes until the motions rely on muscle memory rather than conscious thought. Test your knot ties with cold hands or while wearing gloves, matching field conditions.
Carve three trial field stakes from yard cuttings to confirm your notch depth and strike face bevels. Inspect your tarp's corner stitching, seam sealing, and ridgeline cord for signs of abrasion or fraying. Pack six dedicated 6-foot guyline hanks with pre-tied bowline loops in your kit bag, and review local forest service regulations regarding deadfall harvesting and designated camp areas before heading into the backcountry.